DIY GUIDE · Updated May 2026 · 12 min read · EcoHome Intelligence
How to Seal an Attic Hatch: The Most Overlooked Thermal Leak in Your Home
Your attic hatch is probably costing you $150–300 per year in wasted heating and cooling. A 2x2 foot unsealed hatch leaks as much air as a 4-inch hole in your wall. Here's how to fix it in under 2 hours with $25 in materials.
In This Guide
Why Your Attic Hatch Is a Money Pit
Most homeowners obsess over windows and doors but ignore the attic hatch. Here's why that's expensive: A typical pull-down staircase or hatch has zero weatherstripping around the frame and a thin piece of plywood or drywall as the door. In winter, warm air rises directly through gaps around the frame. In summer, attic heat (which can hit 140°F) radiates down into your living space.
According to Department of Energy data, an unsealed attic hatch can account for 15–20% of total attic heat loss—more than all your eave vents combined. For a home spending $2,000/year on heating and cooling, that's $300–$400 in pure waste.
The fix is simple: seal the cracks around the frame and insulate the hatch itself. Most homeowners can do this in an afternoon for under $30.
Materials You'll Need (~$25)
- Self-adhesive foam weatherstripping tape (3/8-inch thick, ~$8) — for sealing the frame-to-hatch gap
- Rigid foam insulation board, 2-inch thick (R-10, ~$10 for a 2x4 ft piece) — for insulating the hatch door
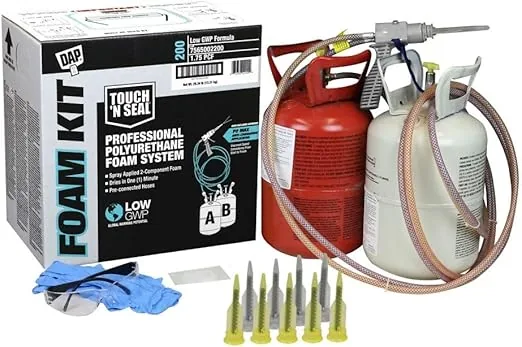
- Construction adhesive (Liquid Nails or similar, ~$5) — for gluing foam to hatch back
- Utility knife and straightedge (you probably have these)
- Optional: Latch kit (~$8) to add a compression latch that squashes the weatherstrip tight
Step-by-Step Sealing Guide
1Inspect the current hatch
Open the hatch and look at the gap between the door and the frame. If you can see daylight, you have a significant leak. Look for gaps around all four sides, especially the hinge side which often wears out first. Check if the door sits flush when closed or if it warps/bows.
2Clean the frame
Peel off old weatherstripping or caulk. Clean the frame surface with a damp rag and let it dry. For wooden frames, lightly sand rough spots so the new tape adheres properly.
3Apply weatherstripping tape
Cut foam tape strips to fit each side of the frame. Start at one corner and press firmly along the entire frame edge. The tape goes on the frame (the stationary part), not the door. Use medium-firm foam (closed-cell if available) that compresses about 50% when the door closes.
At corners, miter-cut the tape at 45 degrees so the foam meets cleanly without gaps. Test-close the door—the latch should require slight extra pressure to engage. If it's too easy, use thicker tape. If the door won't close, use thinner tape or trim the foam.
4Insulate the hatch door
Cut rigid foam board to fit the back of the hatch door (the side facing the attic). Apply construction adhesive in a zigzag pattern and press the foam firmly in place. Hold for 30 seconds or use temporary weights. Add a second layer perpendicular to the first if you want extra R-value.
For pull-down stairs: Build a simple foam box that fits over the folded stairs. Cut four pieces of 2-inch foam and tape them together with foil tape, then place the box over the stairs from above. Attach a handle so it's easy to remove when you need attic access.
5Build an insulation dam
If you have blown-in insulation in the attic, build a raised frame around the hatch opening using scrap lumber or rigid foam. This prevents loose-fill insulation from falling onto the hatch door every time you open it. The dam should be at least 6 inches taller than your insulation depth.
6Test with a smoke pencil or incense
After sealing, close the hatch and hold a smoke pencil or burning incense stick near the edges on the living-space side. If you see smoke being pulled upward or pushed sideways, you still have leaks. Add more tape or caulk those spots.
Build a Better Hatch Cover (Optional Upgrade)
If your attic hatch is just a thin piece of plywood, consider building a proper insulated door:
- Cut a piece of 3/4-inch plywood 1 inch larger than the opening on all sides
- Glue 2-inch rigid foam to the top (attic-facing) side
- Add a handle to the bottom for easy opening
- Install compression latches on two sides to pull the door tight against the weatherstrip
- Seal the plywood-to-foam edge with foil tape
This DIY insulated hatch achieves roughly R-15–R-20 and costs about $35 in materials. It's the single highest-ROI attic upgrade you can make.
Want the full attic insulation checklist?
Our energy audit includes hatch sealing templates, insulation calculators, and air-leak detection methods for every room.
Frequently Asked Questions
Do I need to seal the attic hatch if my attic is already insulated?
Yes. Attic insulation in the floor does nothing to stop air moving through the hatch gap. Think of it like wearing a winter coat with the zipper open.
Can I just use regular caulk instead of weatherstripping?
No. Caulk is for gaps that don't move. Your attic hatch opens and closes, so you need compressible weatherstripping that can spring back. Silicone caulk will crack within weeks of repeated opening.
How much money will sealing my attic hatch save?
In a typical 2,000 sq ft home with $2,000/year in heating/cooling costs, a sealed and insulated hatch saves $150–$300/year. Payback is 1–2 months.
Should I seal other attic access points too?
Yes. Kneewall doors, whole-house fan louvers, and dropped soffits over kitchen cabinets are all common air leaks. Treat them the same way: weatherstrip the frame and insulate the panel.
Can I seal a pull-down attic ladder?
Yes, but it's harder because the moving parts make weatherstripping tricky. The best solution is a pre-made insulation tent (like the Attic Tent or Atticarmor) that fits over the folded ladder from the attic side. Or build your own foam box with a handle.